Watch the complete walkthrough
Watch the latest Store Submission Manager publishing walkthrough, then use the written steps below for a first release. The submission workflow applies to supported packaged Windows apps and games; game-specific settings are called out below.
Watch the publishing walkthrough on YouTube ↗
Opens YouTube in a new tab. No player or YouTube tracking is loaded on this page. Screenshots below illustrate the workflow and are cropped to exclude account details and submission identifiers; labels may differ in the latest video or your installed version.
Jump to a step in the written guide
- Install SSM and prepare API access
- Reserve the product name
- Prepare the Store upload package
- Create the draft and localized listing
- Add and verify the package
- Review pricing and trials
- Check markets and availability
- Complete properties and certification notes
- Check and save the draft
- Finish the Partner Center handoff
- Review and submit
Before you start
- Install Store Submission Manager from Microsoft Store. On first launch, read the disclaimer, use Read the full disclaimer if needed, and select I understand to continue. Keep independent copies of important content and packages.
- Have an active Partner Center developer account and API credentials. Use Need help? on the connection screen for the setup guide and setup video: associate the Microsoft Entra tenant, create or add an application, assign access, and record its tenant and client IDs.
- Connect using a client-secret value or a configured client certificate. Keep authentication material private; do not include it in screenshots or support requests.
- Prepare tested application source/build tooling, listing text, screenshots and artwork, pricing decisions, privacy-policy information, and certification instructions.
This guide is for supported packaged Windows products. SSM does not compile your application or turn a website URL into a Windows package.
Generate its Windows Store package outside SSM first. Use the reserved product's identity and publisher information when packaging, then bring the resulting compatible MSIX/AppX, bundle, or upload package into SSM. A website URL alone cannot be imported as a package.
1. Reserve the product name
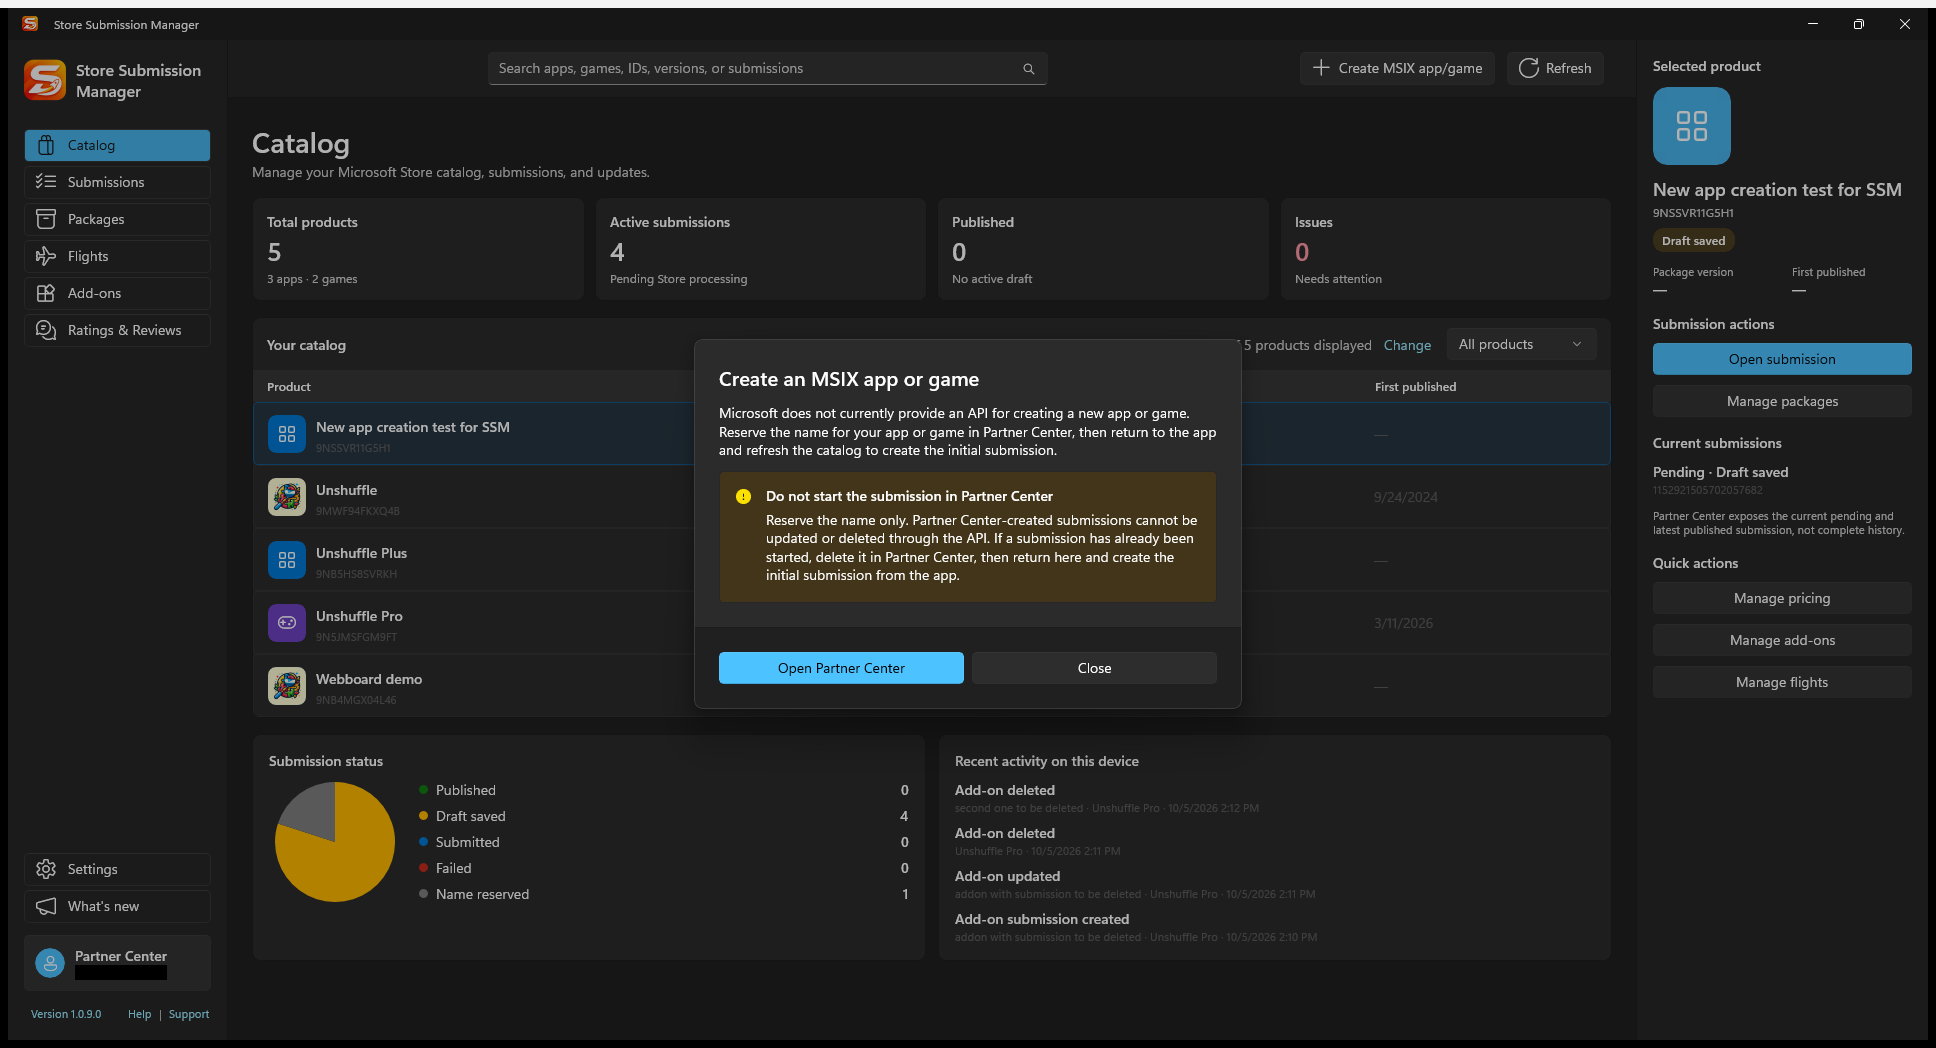
After connecting, Catalog shows indicators for total products, active submissions, and publication status. Select a product to inspect its details, submission actions, and acquisition chart in the right-hand pane. A newly reserved product will not yet have published-product history.
- In Catalog, select + Create MSIX app/game (or the equivalent new-app/game action in your version).
- Read the guidance, then choose Open Partner Center.
- Reserve your app or game name in the correct publisher account. Reserve the name only; do not start a submission in Partner Center.
- Return to Catalog and select Refresh. If the product is hidden, check the managed-product selection in Settings > Partner Center.
2. Prepare the Store upload package
The video uses Visual Studio. An equivalent packaging toolchain is fine if it produces a compatible upload file for the reserved identity.
- Open the app or packaging project in Visual Studio. Use Publish > Associate App with the Store (the location can vary by project type).
- Sign in to the correct developer account and select the name just reserved. Review the Store identity and publisher information applied to the project.
- Use Create App Packages, choose Microsoft Store distribution, and review the version, build configuration, and supported architectures.
- Build the package and retain the generated
.msixuploador other compatible Store upload file. Test the build and address relevant validation findings before submitting it.
SSM uploads an existing package; it does not replace Visual Studio's association, build, or packaging steps. Keep the original binary for later reuse in the package repository.
3. Create the initial draft and Store listing
- Return to SSM, select the reserved product, open its submission workspace, and choose Create first submission / New submission. Read the first-submission warning and create the draft in SSM.
- Under Listing > Manage languages, add the required locale, such as English (United States). Choose the listing and open Product details.
- Enter the localized title, description, features, keywords, and other applicable text. Review the Store-style preview and apply the editor's changes.
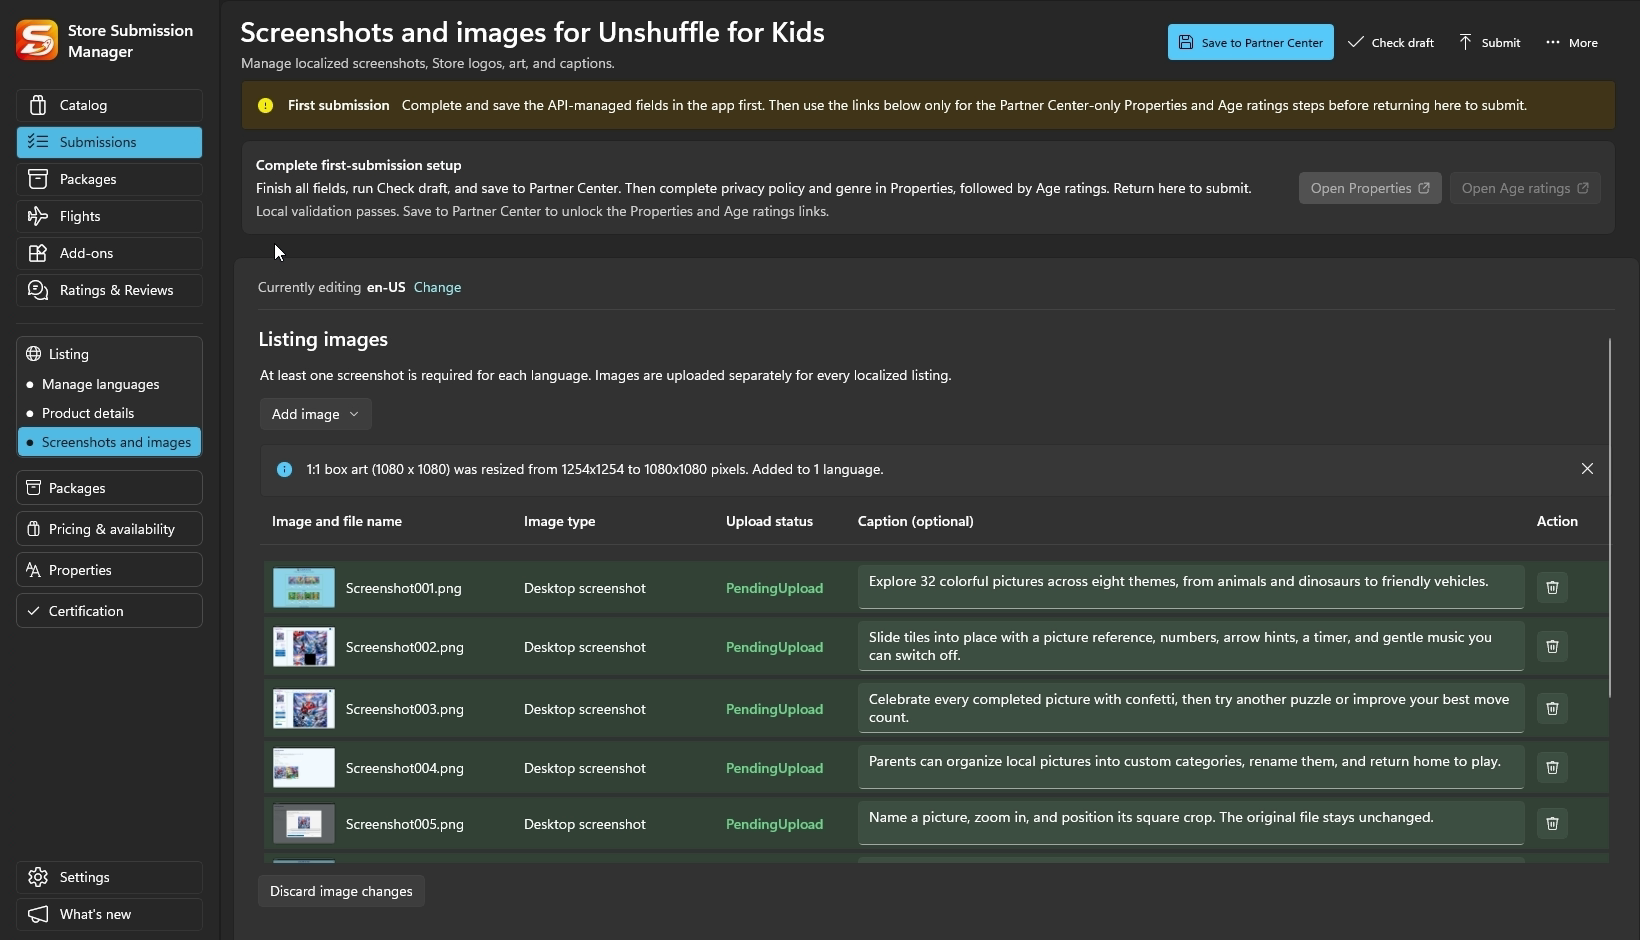
- Open Screenshots and images, choose the appropriate image types, and add screenshots and required artwork from disk. Review their previews, ordering, and optional captions.
For supported fixed-size PNG artwork, SSM can resize a larger image with the required aspect ratio. It does not correct the wrong aspect ratio or make an undersized asset suitable automatically. Follow each image type's validation message and inspect the result.
Multiple languages: add the intended listing languages first, then use multi-language image import to apply selected screenshots across them. This is a Pro workflow; it does not translate text or make language-specific screenshots appropriate for every locale. Review each localized listing before saving.
4. Add and verify the package
Open the submission's Packages editor. Select the upload file from your computer, or use Add from repository if the correct binary is already retained. Verify the embedded product identity, version, architectures, and complete package set. A matching filename is not proof of a matching identity.
The video shows rollout controls but does not use them for this first release. Configure release behavior deliberately rather than copying update-only or gradual-rollout choices into an initial submission.
5. Review pricing and trials
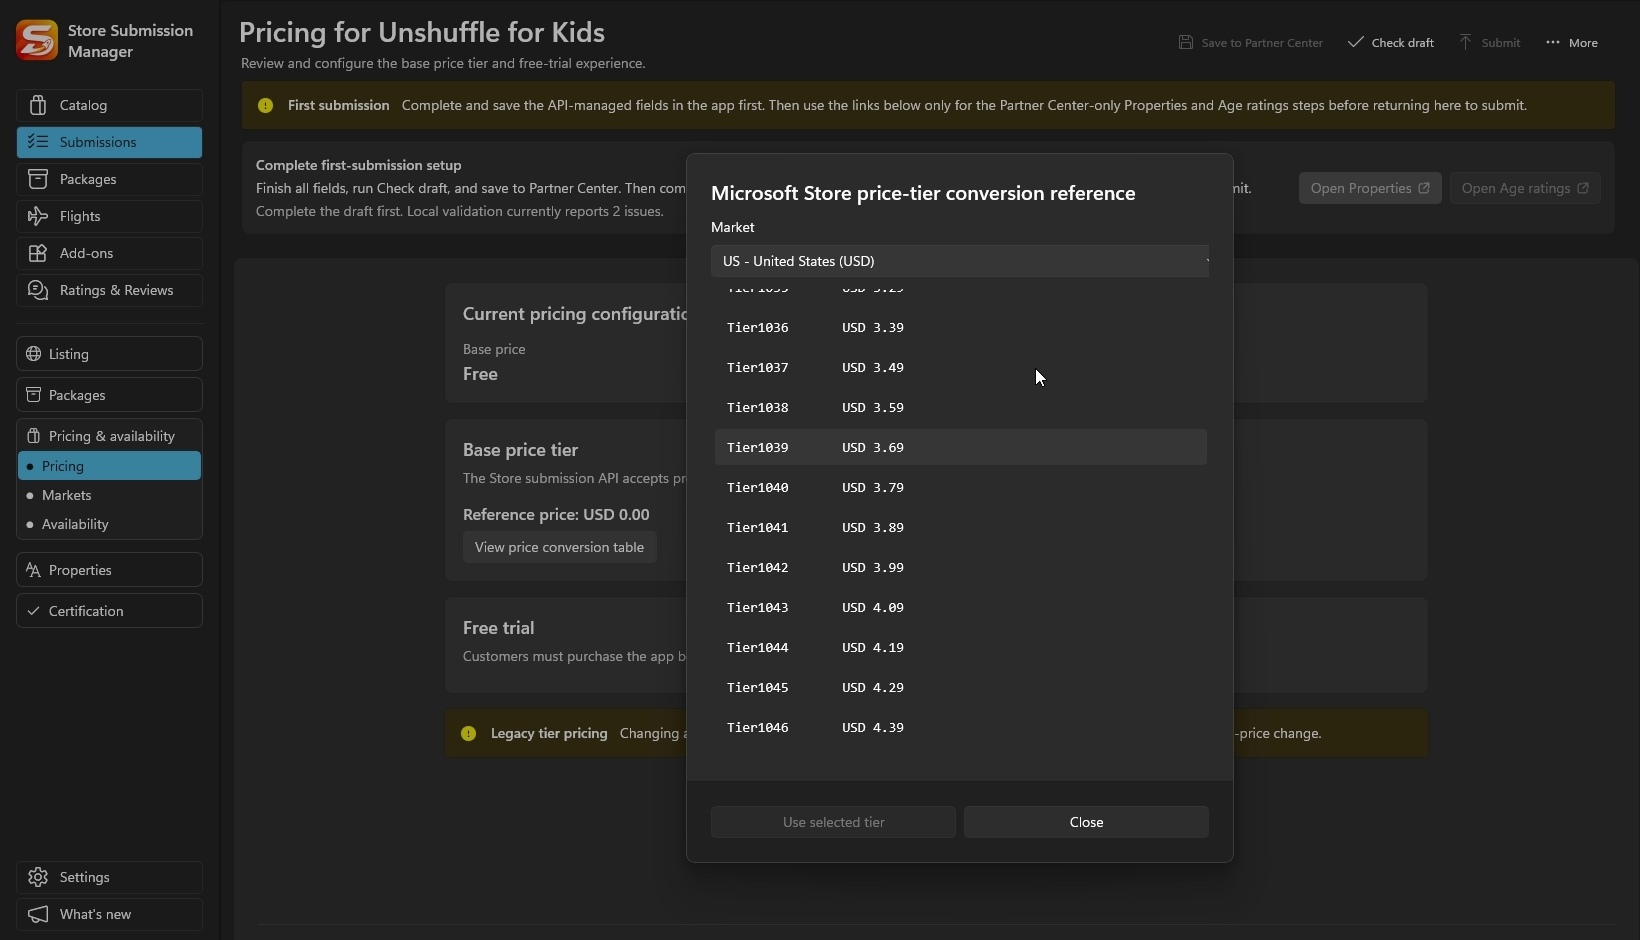
Under Pricing & availability > Pricing, select Free or an appropriate base price tier. The submission API path used by SSM uses legacy tier-based pricing: a tier maps to individual prices in supported currencies rather than a single amount converted at a live exchange rate.
Inspect the Store price-tier conversion reference before choosing a paid tier. The reference table can also be downloaded from Partner Center; verify current prices there when making commercial decisions.
Configure a trial period if applicable to the product, and ensure the app implements the intended trial experience. Otherwise leave the no-trial choice selected.
6. Check markets and availability
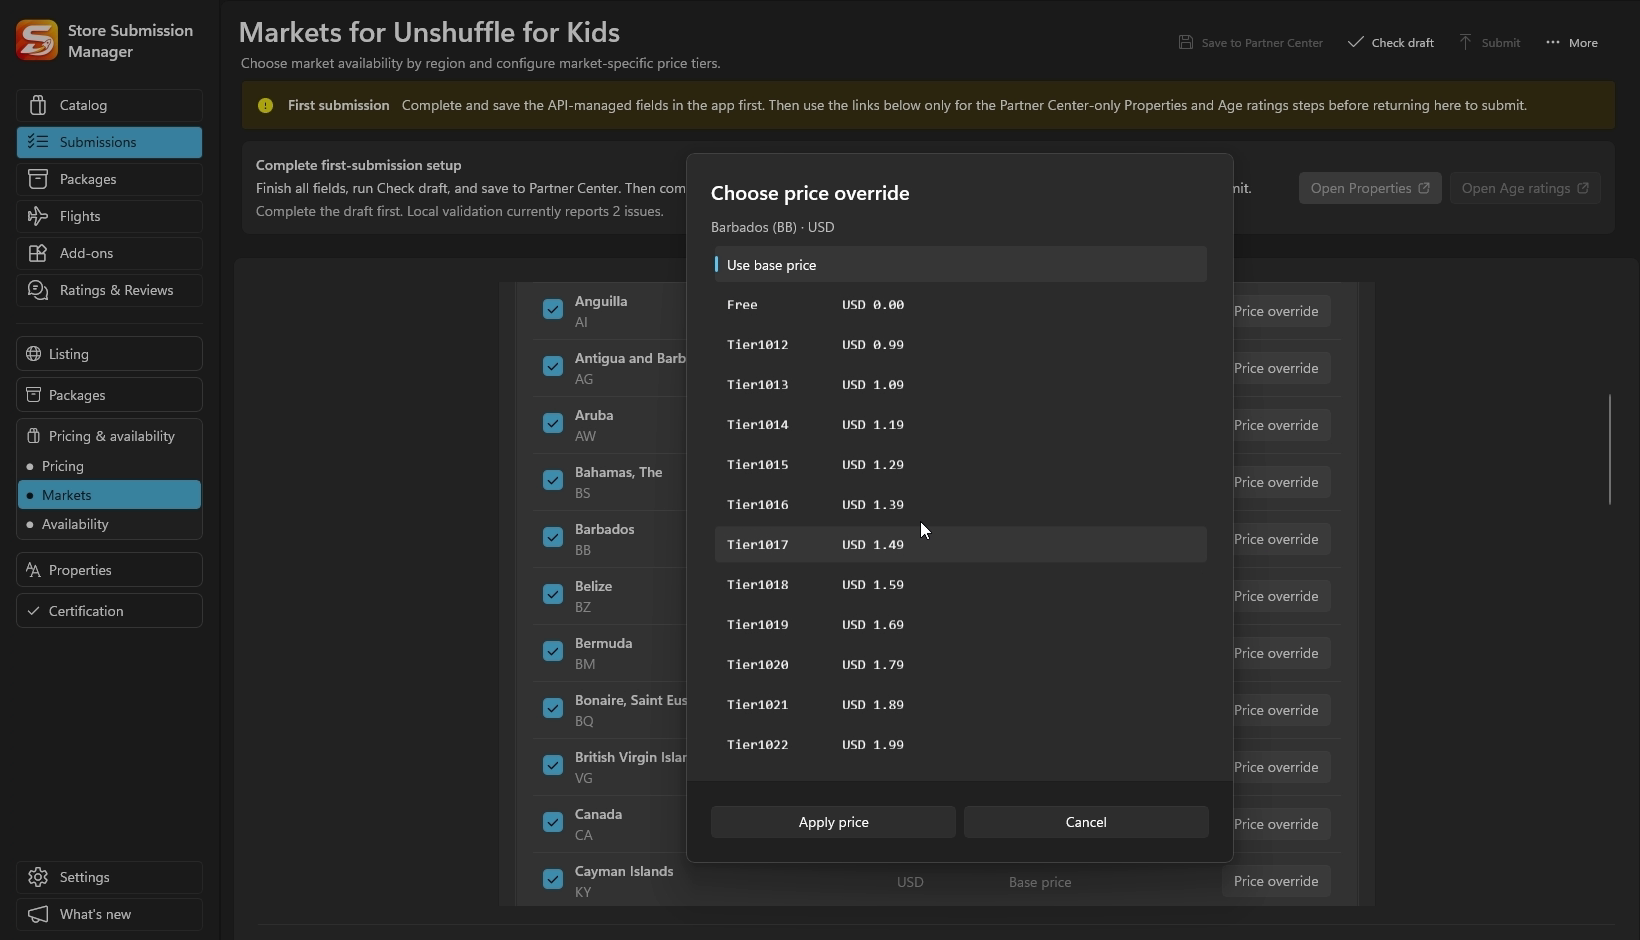
Open Markets. Markets are grouped by continent so regional choices are easier to review. Control availability for each individual market, keep the base tier there, or choose a market-specific tier override if its mapped price is unsuitable.
Market profiles let Pro users save and reapply a set of market/pricing choices. Review a profile's effect on this product before applying it; a reusable profile is not a substitute for checking local prices and availability.
In Availability, review visibility, publication timing, and supported device families. A manual release still needs a later publication action after certification; scheduled publication is not a guarantee that certification finishes by that time.
7. Complete properties and certification notes
Open Properties and choose the correct category and subcategory. For a game, explicitly set Games here even if it was reserved as a game in Partner Center. Review hardware preferences and product declarations against the actual application.
In Game settings, select the required primary genre and any applicable additional genres, player modes and player counts, and supported capabilities such as Game DVR, broadcasting, or cross-play. Do not claim features the game does not implement. Read warnings for platform-specific settings that still need Partner Center.
In Certification > Certification notes, provide useful test instructions, sign-in/test-account information where needed, and explanations that help certification exercise the product. Do not put production credentials or unrelated secrets in these notes.
8. Check locally, then save to Partner Center
- Run Check draft. Resolve errors and review warnings rather than assuming that a zero-error result covers every Partner Center-only requirement.
- Select Save to Partner Center. Wait for the package, images, and draft content to finish saving; address any upload or API error before continuing.
- Follow the first-submission setup banner only after the save succeeds.
Check draft is local preflight, not a certification guarantee. A warning about an unsupported API field needs review even when it does not prevent saving.
9. Finish the guided Partner Center steps
Complete and save the API-managed content in SSM first. Use the provided links for the required first-submission Properties and Age ratings steps only. Do not edit the same listing, packages, or pricing in both tools: general Partner Center submission edits can prevent subsequent API editing or commit.
- Choose Open Properties. Complete the privacy-policy URL/declaration and any remaining required genre/property information on the linked Partner Center page. Save changes there.
- Next, choose Open Age ratings. Complete the questionnaire accurately and save the resulting ratings. The video shows the resulting ESRB and other applicable regional ratings; a game's rating depends on its answers, not on this example.
- Return to SSM, follow its completion prompts, and refresh/recheck the saved submission before the final review.
These are first-submission setup steps in this walkthrough. Later updates can normally be prepared and submitted entirely in SSM unless a Partner Center-only setting or requirement needs attention.
10. Review and submit
Select Submit and inspect the final review: packages, listing languages, images, prices, properties, and release choices. A first release has no last-published baseline; “baseline not available” is expected, not proof that the draft is complete. For later releases, review the comparison with the last published submission.
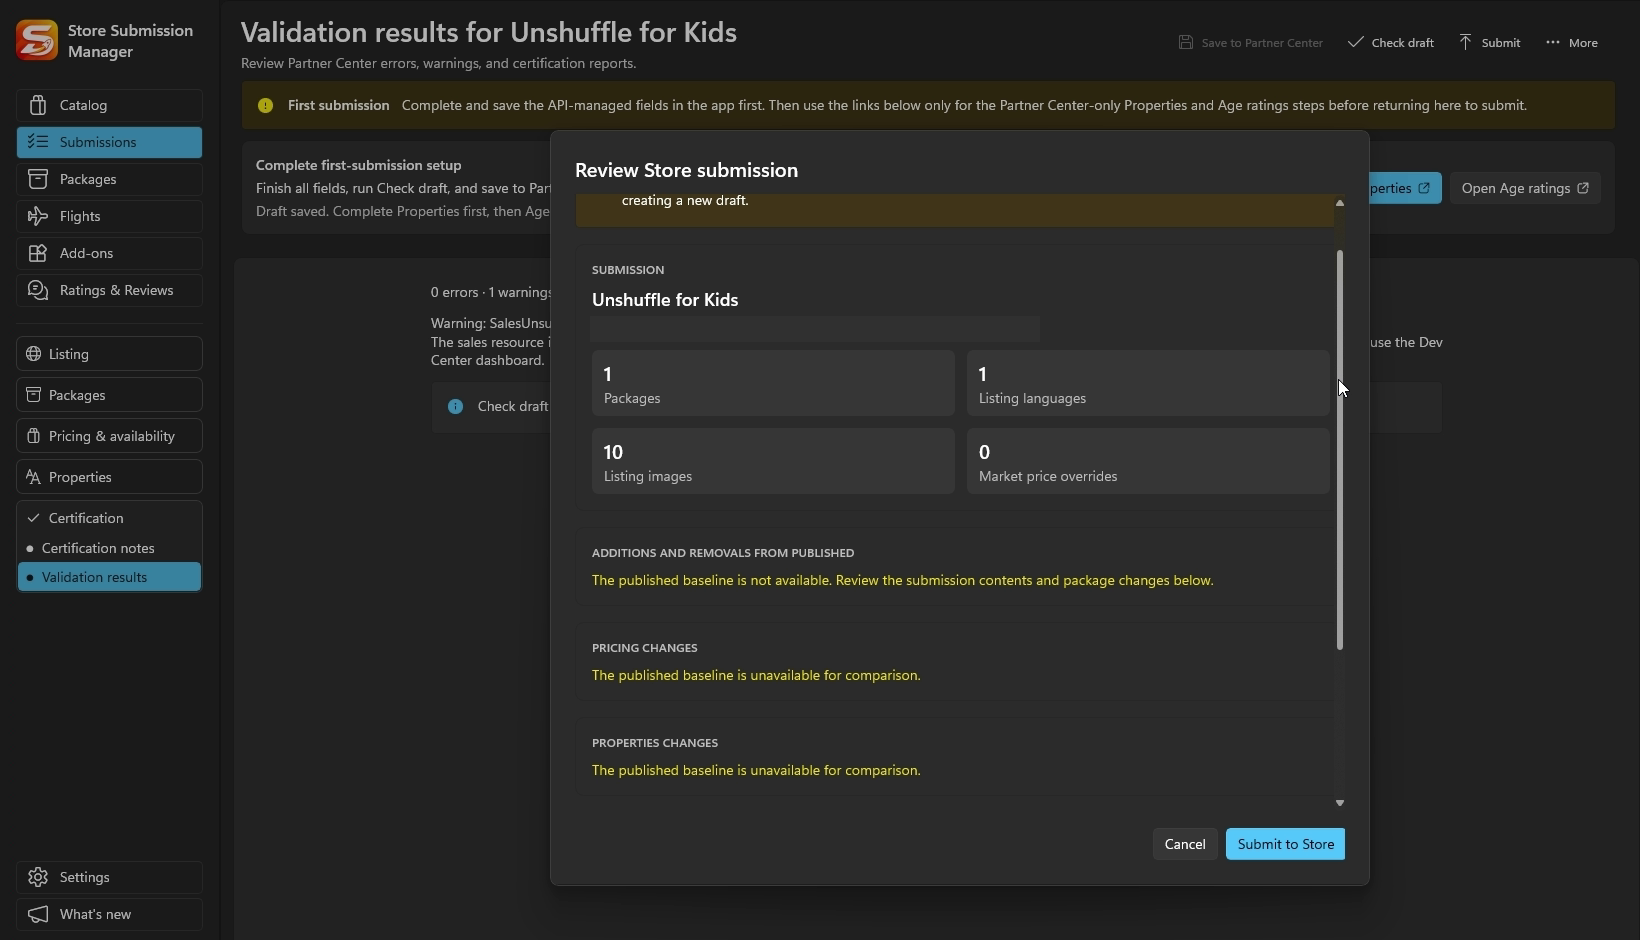
Confirm Submit to Store only when ready to start processing. A successful save alone does not send the draft to certification.
11. Monitor, then verify the Store release
- Follow the submission in SSM and Partner Center. Use Refresh status for a fresh API check rather than relying on cached status.
- Read validation/certification failure details if processing stops. Review any partial success before retrying a save or submission.
- After certification, follow the chosen publication mode. Complete manual publication in Partner Center if required.
- Once published and available, open the product's Store link or search for it if it is searchable. Verify the listing, install on an appropriate device/account, and test the actual Store-delivered build.
The video's waiting periods are edited down. Processing, certification, Store propagation, search visibility, and customer availability can take different amounts of time; the demonstration is not a timing promise.
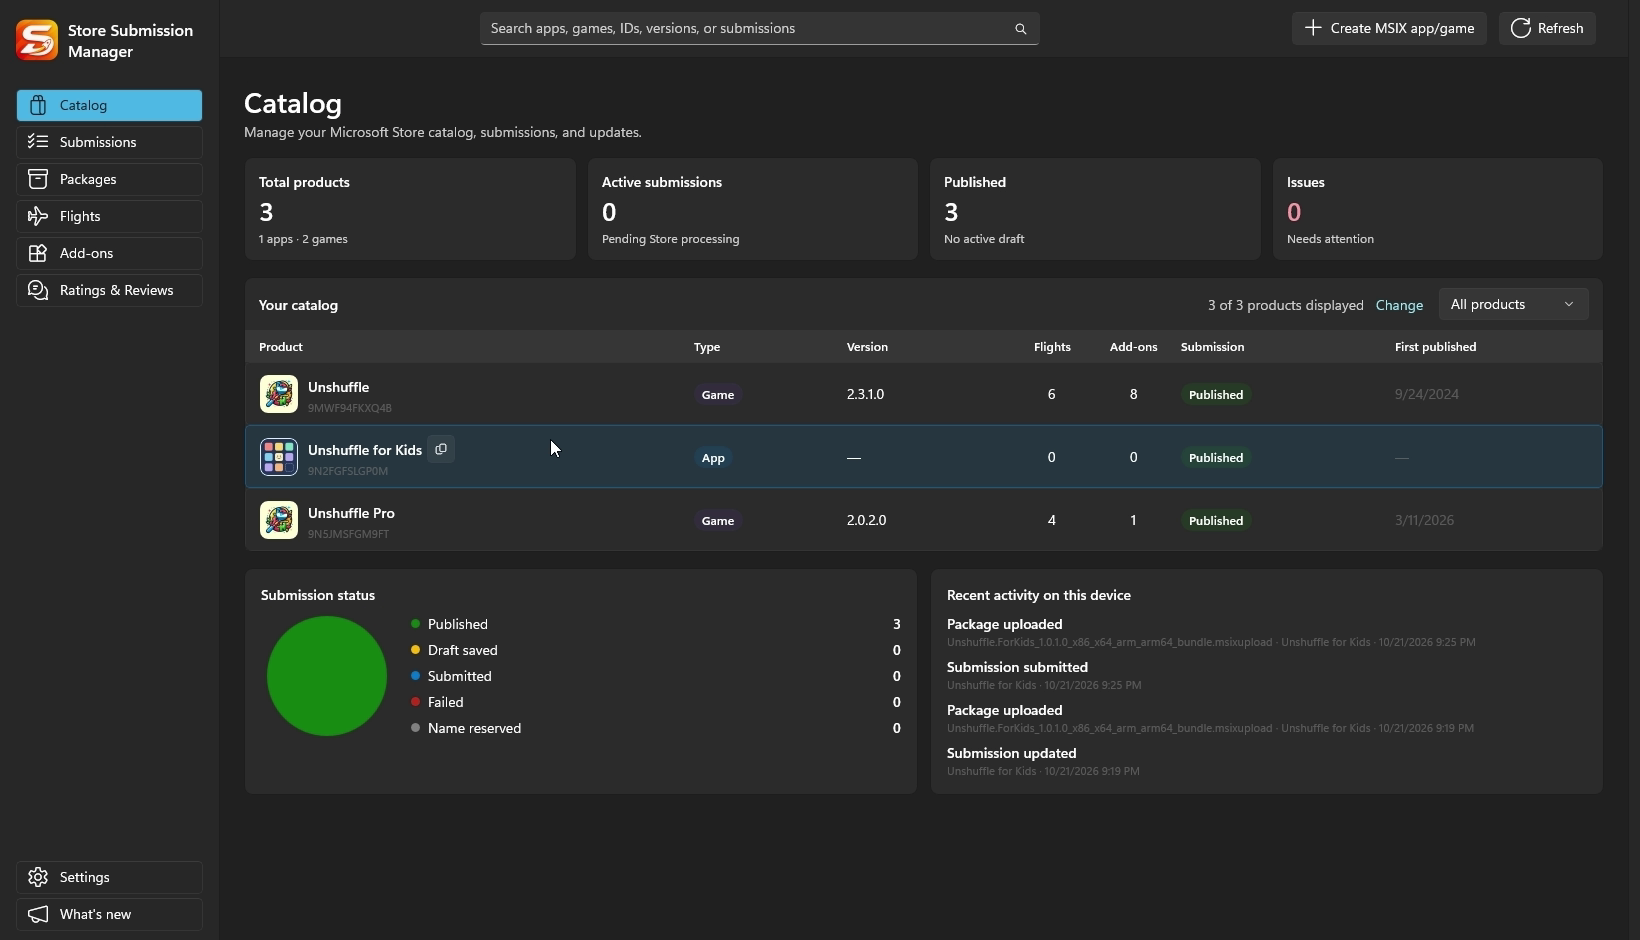
The published submission is read-only. For the next release, create a new draft and compare it with the published version instead of trying to edit the released submission.
If something blocks you
Partner Center-managed draft: SSM cannot edit a draft created there. Preserve its work before deliberately deleting it in Partner Center and creating an API-manageable draft from SSM. Do not discard a valuable draft just to follow this guide.
Identity mismatch: rebuild/repackage using this product's reserved identity. Renaming a file does not change its embedded identity.
Missing listing or policy information: complete the highlighted requirement in the appropriate SSM editor or Partner Center page, then check again.
Microsoft's submission API reference describes tier/trial fields and the restrictions on mixing API and Partner Center editing. This guide documents the guided first-submission path demonstrated in SSM, not unrestricted editing across both tools.