Watch the update walkthrough
Follow Unshuffle for Kids from a version 1.0.2 build to a published Microsoft Store update. The walkthrough keeps the English listing, adds 12 languages for 13 total, maps screenshots to translated captions, and checks the updated game and Hindi Store listing.
Watch the update walkthrough on YouTube ↗
Opens YouTube in a new tab. No player or YouTube tracking is loaded on this page. The written steps follow the recording; labels may differ in your installed version. Existing screenshots below illustrate submission status and draft restrictions, not captures from this video.
Video chapters
- 00:00 — What this update walkthrough covers
- 00:24 — Introduction and saveable update map
- 01:04 — Build the updated Store package
- 01:31 — Add the build to the Packages repository
- 02:07 — Create an update draft and replace the package
- 02:46 — Plan 13 listing languages
- 02:57 — Add Hindi and reserve a localized app name
- 04:02 — Add screenshots, captions, and artwork
- 04:35 — Export listings and import the CSV into Excel
- 05:40 — Inspect translated listings and image filenames
- 06:28 — Import languages and match screenshots
- 07:09 — Review imported languages and screenshots
- 07:32 — Check the draft and save to Partner Center
- 07:52 — Review changes and submit to Store
- 08:15 — Track commit, validation, and certification
- 08:44 — Confirm publication in SSM and Partner Center
- 09:04 — Install from Microsoft Store and verify the update
- 09:30 — Verify the Hindi Store listing
- 09:45 — Recap and next steps
Pause at 00:59 to save the update map as a reference. If the map says ten added listings, use the final demonstrated count instead: twelve added, thirteen total. Your release does not need the same language or image counts.
Before you start
Connect to the account that owns the published product. For a binary update, prepare a correctly identified newer package and test it first. You can also make a listing-only or pricing update without replacing the package.
Have your listing text, screenshots, artwork, and reviewed translations ready. The bulk listing export/import workflow shown here requires an active SSM Pro pass. SSM does not translate the text for you, and translating a Store listing does not translate your app or game interface.
Check for an existing draft or an in-progress submission before starting. Coordinate with anyone editing the same product in Partner Center or another SSM session.
Publishing for the first time? Follow the first-submission video and written walkthrough instead. Once its initial setup is complete, updates can normally be prepared and submitted in SSM unless a Partner Center-only setting or requirement needs attention.
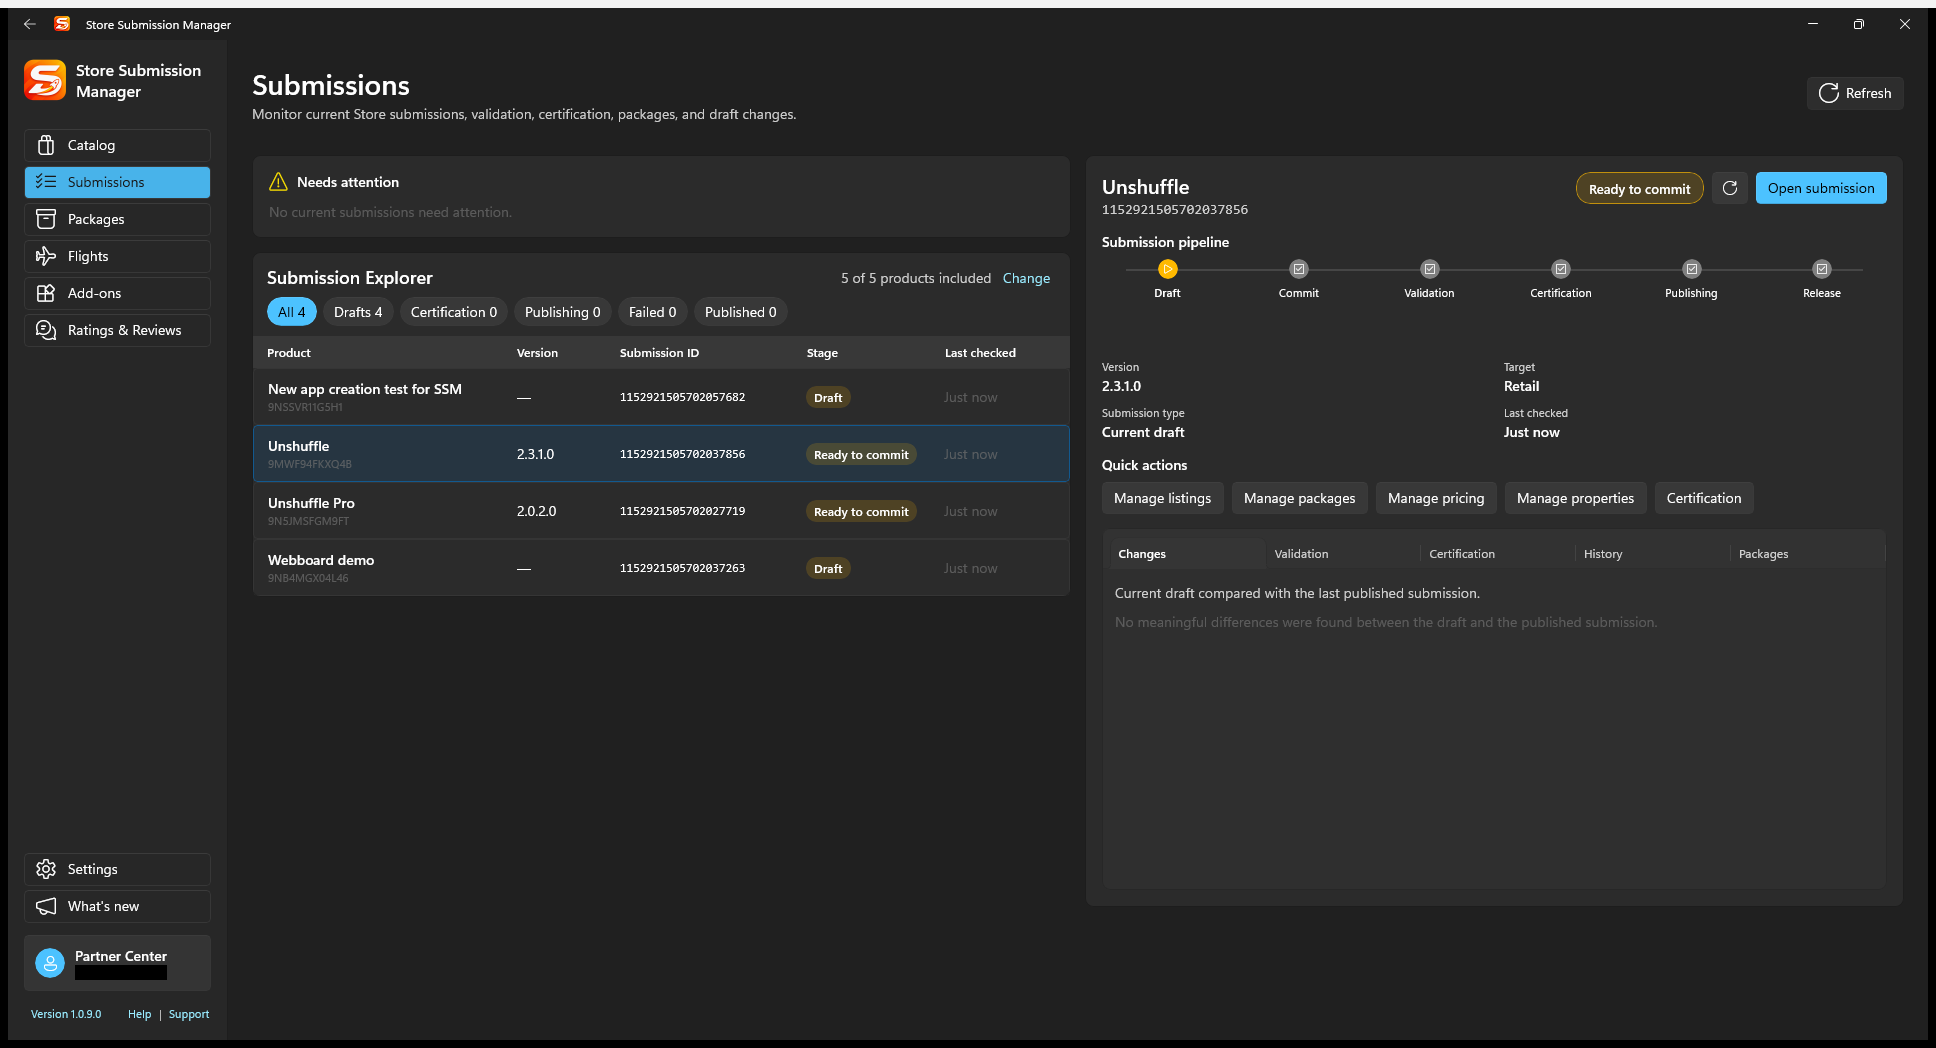
1. Build and retain the updated package
- In Visual Studio or your packaging toolchain, generate a newer Store-associated upload package for the same published product identity. The video uses version 1.0.2; choose the appropriate higher version for your release.
- Test the updated build. Keep the original upload file and the previous release package independently of SSM.
- In SSM's Packages repository, add the new upload file. Review its identity, version, architectures, languages, minimum OS, and restricted capabilities.
- Optionally tag the build so it is easier to find later. Tags organize local packages; they do not change the Store package identity.
The repository is a local reuse tool, not a Store submission. You can also select a package directly from disk when editing the draft. See the package repository guide.
2. Open a draft and replace packages
- Open Catalog or Submissions, select the app, and choose Open submission.
- Use New submission if no editable draft exists. If there is an existing SSM-manageable draft, open and review it instead of starting over.
- For a binary update, open the submission's Packages section. Use Replace packages > From computer or From repository, or add packages as appropriate. Review the resulting complete package set so required architectures are not accidentally removed.
- Review replacement coverage across device families, architectures, and OS requirements. Do not remove an older package if it is still needed for devices the new package does not cover. If both packages are intended to remain, cancel the replacement and review the resulting package set.
The update draft starts from the published product's content and release settings. Review those inherited settings; a new binary does not require changing every listing or price.
3. Add a language and prepare its listing
- Open Listing > Manage languages. In the video, Hindi (India) is added by cloning the existing English listing. Cloning provides a starting point, not a translation.
- If using a translated product title, open the product's Product management > Manage app names in Partner Center. Check availability and reserve that name for the same product.
- Back in SSM, select the language tile and edit its title, description, features, keywords, and release notes as applicable. Review the Store-style preview.
- Open Screenshots and images. Add screenshots, translated captions, and the required artwork for that language. Inspect image order and use the correct image types.
A new locale cannot simply point at an earlier submission's English images. Supply local image files for upload, or reuse an image set that SSM still has locally. A filename in a CSV is not the image itself. Check that screenshots and their captions are appropriate for the destination language.
Keep Partner Center work focused on the required name reservation or other Partner Center-only setting. Avoid editing the same API-managed draft content in both tools. Local draft edits, including work retained across restarts, are not saved to Partner Center until you explicitly save.
4. Export listing text and translate offline (Pro)
- Choose Export Listings and save the CSV. Keep an unchanged copy before sending a working copy to a translator.
- For Excel, use Data > Get Data > From Text/CSV rather than opening the CSV directly. Check that non-English text displays correctly in the import preview, then load the table.
- Use the exported structure to prepare the destination locales and translated fields, including screenshot captions. Preserve field identifiers, locale identifiers, and image references; do not replace the format with an arbitrary spreadsheet.
- Save the translated exchange file as CSV with Unicode text preserved, not as an Excel workbook. Reopen it through the same import path and check accents, non-Latin scripts, line breaks, and columns before bringing it into SSM.
The demonstration grows from English and Hindi to 13 listing languages total. Choose only languages for which you have suitable, reviewed content. Listing exchange moves text and image references; it does not automatically translate content or supply missing screenshot files.
5. Import languages and match screenshots (Pro)
- Choose Import Listings and select the translated CSV. Inspect the languages and any validation feedback before applying the import.
- In the import dialog, inspect the available source image sets. Reuse an existing language's locally available images when appropriate, or upload a new image set.
- Preview each image and its translated caption. If a mapping is wrong, choose Change Image, then double-click the correct thumbnail or select it and choose Use Image.
- Apply the import, then open the destination language tiles. Check titles, descriptions, features, release notes, screenshot order, captions, and artwork, including non-Latin text.
Do not assume the CSV imported correctly just because it was accepted. Review every language you intend to publish and resolve missing images or mismatched captions before saving. Keep the source CSV and local assets until the release is verified.
6. Compare, check, save, then submit
- Review the draft-versus-last-published comparison in Submissions. Confirm the intended package replacement, listing languages, images, pricing, availability, and release settings. Leave unrelated settings unchanged.
- Run Check draft and inspect errors and warnings. This is local preflight, not Microsoft's certification result.
- Select Save to Partner Center. Wait for upload/save completion and address any service error before continuing.
- Choose Submit and review the saved submission's change summary and publishing settings once more. The video's example has 13 listing languages, 97 images, no price changes, and one package replacement; these are example counts, not requirements.
- Confirm Submit to Store only when ready to start processing.
- Track progress in Submissions. Use Refresh status; if processing fails, read Failure details before changing and resubmitting.
Expected result: your update enters processing while the previous published release remains the reference. Certification completion and customer availability are separate from saving the draft.
7. Verify publication and the customer experience
- Follow commit, validation, certification, and publication in Submissions. Use Refresh status for a fresh API check and confirm the result in Partner Center. Inspect failure details if processing stops.
- Follow the selected release mode, including any manual publication action required after certification. A successful save or completed certification alone is not proof of customer availability.
- Once available, open the product's Microsoft Store link, or search for it if searchable. Install or update from the Store and launch the app. Verify its version and changed behavior; the video checks the new category browser.
- Check a localized Store listing as a customer. The video places Hindi in Windows' preferred languages, then checks the Store title, description, and product features. Reopen the Store if needed and restore your language preferences after testing.
Listing language, market availability, and the app's own UI language are separate. A localized Store page does not prove that the installed app is translated. Processing waits in the video are shortened; certification and Store propagation times are examples, not guarantees.
Common blockers and recovery
The draft is read-only: a Partner Center-created draft cannot be managed through this SSM workflow. Preserve its changes first; only then decide whether to delete it in Partner Center and recreate from SSM.
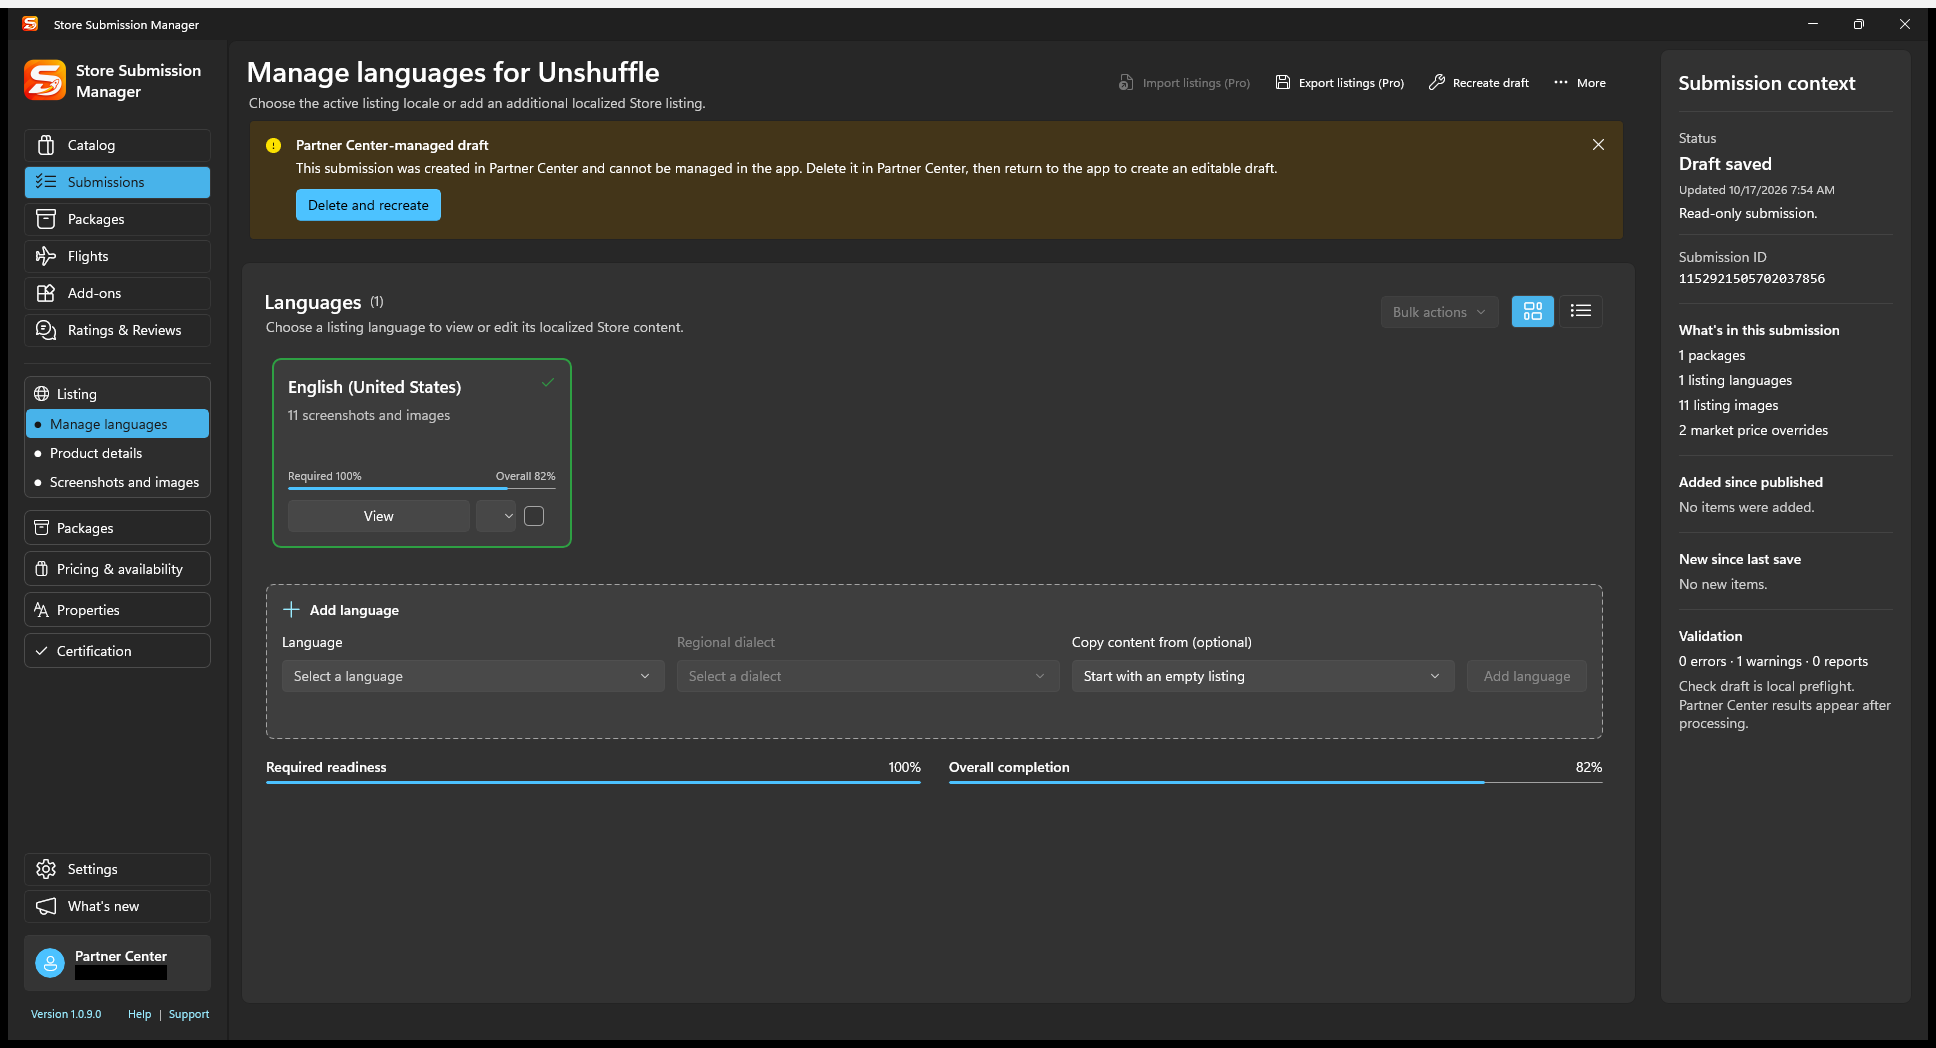
There is already a submission in processing: refresh status and wait, or use supported cancellation deliberately. Do not repeatedly recreate a draft to bypass processing.
Recreate draft is offered: this can discard draft work. Export/preserve anything you need, read the confirmation, and do not treat it as a routine refresh.
Imported text is garbled or images are missing: recheck the CSV encoding and column structure, then supply the local image files and review the import mappings. Do not submit a partially reviewed language set.